Related articles


Training Wisteria: The Complete Guide

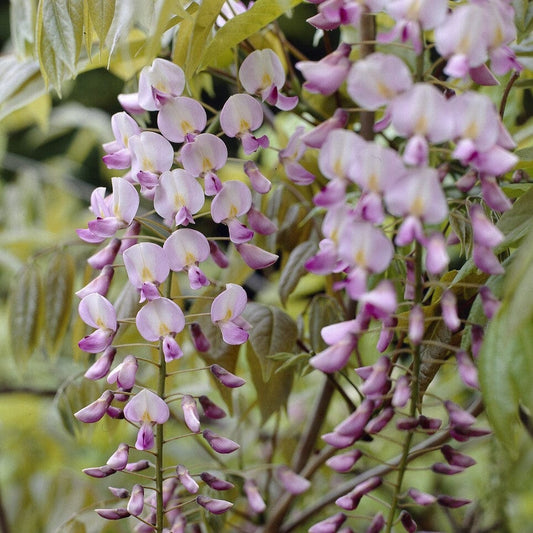
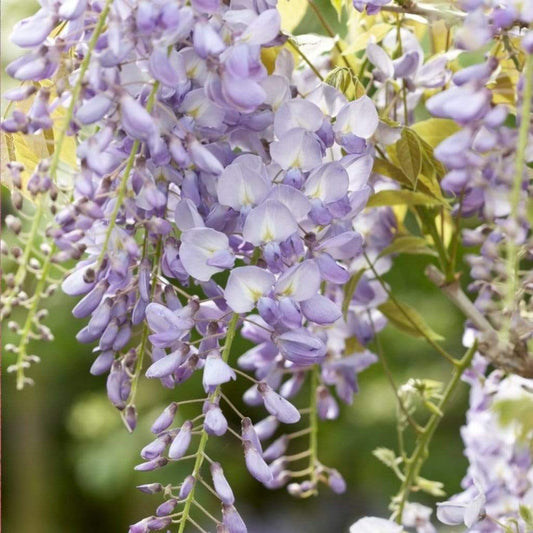
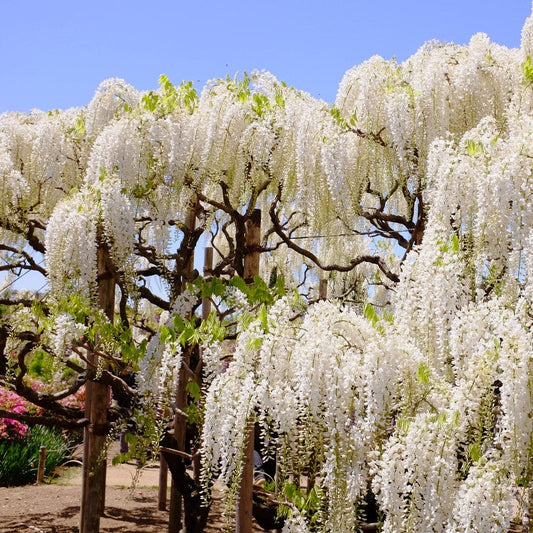
There isn’t enough praise in the world that can be heaped upon wisteria – but that’s not going to stop us from trying! The quintessential chocolate-box climber that oozes character from every one of its woody vines. The sumptuous sprays of lavender, pink or white flowers that elevate mere brick and mortar to picture-perfect rustic tableaus. The one and only wisteria.
OK, now that our swooning is over and done with, it’s time to get serious. We’re talking about training wisteria. Don’t worry, you can put your running shoes and gym towel away – we mean learning how to properly grow your wisteria plant up a support or surface. With just a bit of care and attention, you can ensure your wisteria’s health and longevity, and help it to grow the way you want it to for many, many years. So, without further ado…
Jump to:
- Training and supporting wisteria espalier-style
- Training wisteria up a pergola or arch
- Training wisteria as a tree
- Growing wisteria on trees
- Choosing the right wisteria variety
How do you train and support wisteria?
Like most climbers that aren’t self-clinging, proper training is especially important when you first get your young wisteria plant. Establishing good foundations whilst the plant is young, in terms of training, will help it when it really gets going and gets heavier down the line.

How do you train wisteria up a wall (espalier-style)?
What you’ll need:
- A drill (plus drill bits)
- Rawl plugs
- Vine eyes
- Turnbuckle tensioners
- Wire (any kind will do but we like to use a 1.5-3mm galvanised wire)
- Wirecutters
- Garden twine
- A can-do attitude (optional)
Wall anchors (or vine eyes) are your best friend when it comes to training your wisteria up a wall, and the key point here is that you get them fixed in nice and tightly right from the off. One of the biggest mistakes people make when training their wisteria is forgetting just how heavy these plants can become as they develop. And ultimately, the more vine eyes you have fixed to your wall, the stronger your support network.
So, let’s get down to the nitty-gritty of how you do it. Flexes knuckles.
Step 1: Drilling the holes and inserting the vine eyes
It’s far easier to prepare your surface and then plant your wisteria than it is to try and work around it after it’s been planted. Honestly, you’ll thank us. Take your drill, and insert a hole either into the brick itself (in the case of older properties) or into the mortar between bricks (for newer builds).
The reason for this is that the mortar used in newer buildings is nice and tough, whilst the bricks often have depressions (or frogs) in them which can mean your vine eye has nothing to grip on to when inserted. The mortar used in older buildings is typically far softer, so that’s why drilling into the brick itself is recommended if you live in a very old property.
Most wisteria plants come with some bamboo canes supporting them, so for your first row of wire along the trellis, drill your vine eye holes just below where those canes reach. That way, you can tie the plant’s stems onto the tension wire right from the off.
Once the holes have been drilled, insert rawl plugs and then your vine eyes. As a rule of thumb, your initial vine eyes should be placed around 1-2m apart from one another, horizontally, and the vertical gap between the vine eye rows should be around the 30-60cm mark.
Top tip: as we alluded to before, good preparation is key, so it’s worth constructing your whole wire trellis at this stage – build it for where you’ll want your wisteria to grow eventually, and not just what it’ll need for its first year or two. Remember, proactivity is better than reactivity.
Step 2: Threading the wire through the vine eyes
Next it’s time to get the tension wire inserted between your vine eyes. Thread your length of wire through one vine eye (you can secure it using a rope clip or just by twisting it back around itself) and take the other end to the other vine eye.
Take your turnbuckle tensioner and hang it from the vine eye currently without any wire attached to it. Make sure to loosen it before you hang it. Attach the wire to the tensioner – again, you can use a clip or clamp, or just twist it around itself. Once attached, tighten the tensioner so that the wire becomes tense, rather than slack. Repeat the process for each tier of your trellis.
Step 3: Planting and tying in your wisteria stems
Once your tension wire trellis is in place, it’s time to plant your wisteria and tie in its stem(s) to the wire. Plant around half a metre away from the wall, and angle the root ball as you plant it, so that it’s pointed slightly inwards towards the wall.
Having removed the bamboo support canes, identify a stem to use as the central leader and tie it gently to the lowest wire rung using garden twine. As it grows upwards, continue to tie it into the subsequent wire ‘rungs’ above it.
Take any lateral or branching stems and guide them along the wire horizontally, tying them in at intervals of 30cm or so. With both the vertical and horizontal stems, you want to tie them securely but not so tightly that it restricts the plant’s movement. And with that, you’re all done! Keep tying in your plant as it grows, but apart from that, sit back, mop your brow and enjoy a tall glass of lemonade – at least until it’s pruning time!
Top tip: if your wisteria can’t immediately reach the first rung of your wire trellis, prop the bamboo cane it came attached to at a slight angle against the wall, and let it grow up and along that until you can tie the stem to the wire.

How do you train wisteria up a pergola or arch?
Another good option for your wisteria if you’re not keen on (or aren’t able to) grow it against your wall, is a pergola or arch.
Pergolas
With their inherent weight and sturdiness, pergolas are a great choice for growing wisteria, as they can withstand their considerable heft as they grow. Planting either in the ground (around 25cm from the post) or a large pot by one of the corner posts of your pergola, start to guide the main stem upwards, tying it loosely around the post as you do so.
Once the plant reaches the top of the post, start to guide the stems along the horizontal beams of the pergola, again tying them in with garden twine. As with training up a wall, you need to be fairly comfortable with heights to grow wisteria in this way, as you’ll need to get up on a ladder in order to prune it every year.

Arches
Arches provide another excellent option for growing wisteria – there’s something very ‘secret garden’ about the prospect of an arch fully clothed with glorious wisteria racemes. Be mindful, though, of choosing too lightweight an arch. If your arch doesn’t have some serious substance to it, then it may creak and become damaged under the weight of a fully-developed wisteria. Seriously, these plants don’t muck about.
How do you train wisteria into a tree (training as a standard)?
Yes, you read that correctly, wisteria can indeed be grown as a standalone tree. Though far less common than being grown as a climber up a vertical support, wisteria can undergo tree form training. How, we hear you ask? Well, relatively easily in actual fact.
The key to tree training a wisteria is in the pruning. But before that, you need to plant your vine. Once you’ve picked your spot, plant your wisteria and attach it to a tree stake or fence post (around 1.5m tall) using strong twine or, even better, tree ties. Work your way up the post, attaching the vine to the support at roughly 20cm intervals.
Make sure to trim off any side shoots that are growing from the vine selected to be your central standard. Once the main stem has grown a little bit above the support it’s attached to – approximately 30cm or so – cut above one of the uppermost buds. This is where the tree's canopy will begin to form.
How do you grow wisteria on trees?
Wisteria’s scrambling nature also means that it can be grown up and around other trees – something like an oak tree is perfect. Part of the appeal of this method is that there’s little to no pruning needed, you can just let nature do its thing and allow the wisteria to climb and climb and climb.

How do you choose the right wisteria variety?
It’s important that you choose the right wisteria variety depending on your wants and needs. If you’re looking to train your wisteria up a wall, for instance, using the wire trellis method we’ve highlighted, then a Chinese wisteria is the one for you. If, by contrast, you’re looking to grow your wisteria as a tree, then something like silky wisteria might be more appropriate.
Want to learn more about caring for wisteria? Check out our comprehensive guide.

Last updated: 22/10/2025