Related articles


Training Fruit Trees: A Complete Guide
Trained fruit trees aren’t just visually stunning, they can save precious space in your garden, create a natural screen and even produce better quality fruit. Training a fruit tree as an espalier, cordon, fan, stepover or patio tree is undoubtedly a skill, but it’s certainly not just for the professionals! In this guide, we’ll talk you through what training is, which fruit trees are suitable, the different types and the ease with which each training type can be carried out.
Jump to:
Training fruit trees – what is it?
A trained fruit tree is one that’s been shaped, pruned and grown in a particular way, as opposed to having simply been left to grow and do its own thing. Training provides gardeners with more growing options, especially where space is limited.
Certain training types, like patio, cordon and stepover, for instance, are fantastic options for more compact gardens, while espaliers and fans offer an excellent way to make use of a sunny wall going spare.
Types of fruit tree training
We’ve touched on the major types of fruit tree training, but now let’s look at them in greater detail:
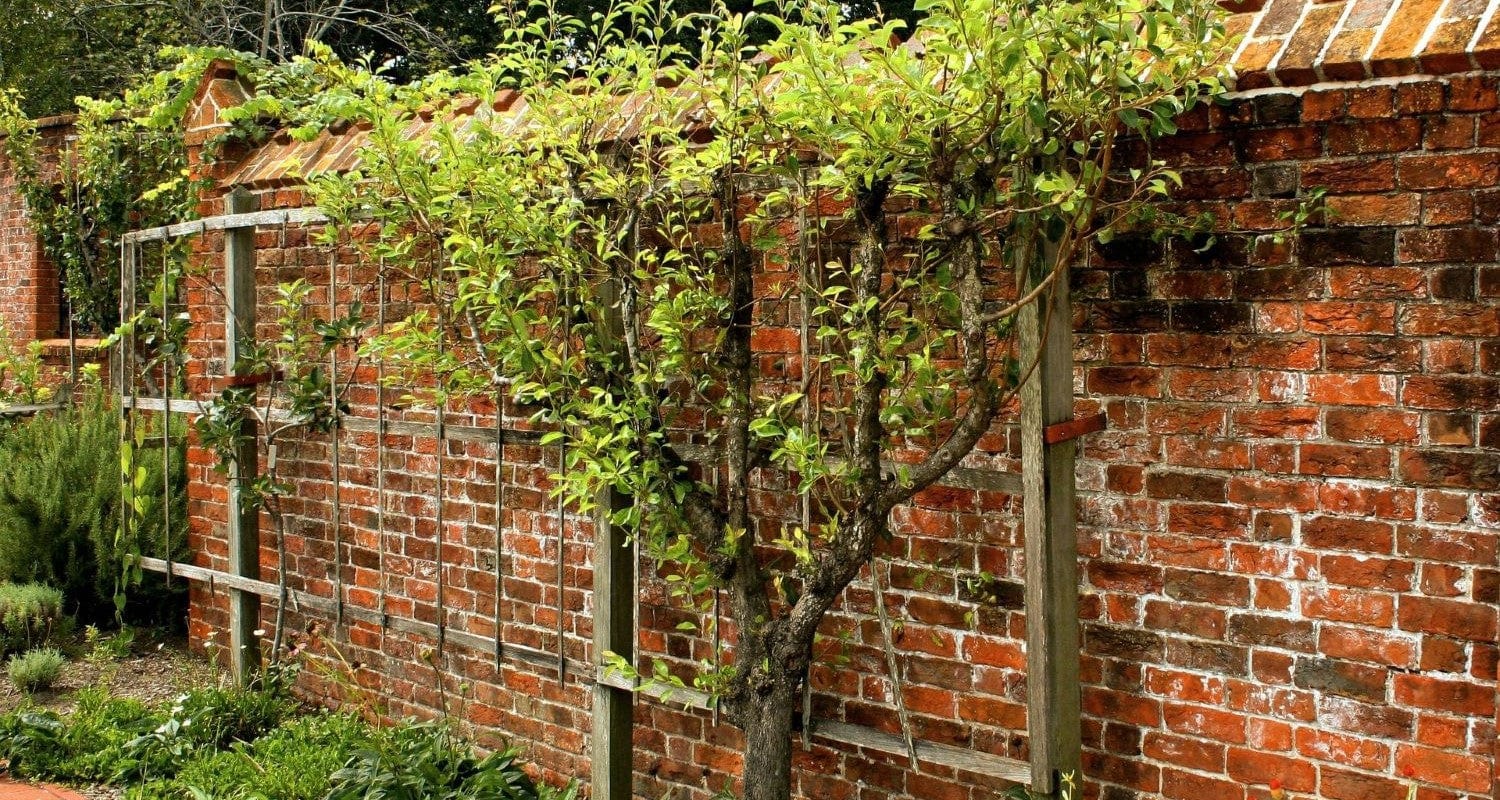
Espalier
An espalier is one of the most decorative forms of fruit tree training, typically comprising a central leader (stem) from which tiered pairs of horizontal, fruit-bearing branches extend laterally. Other types of espalier training include the Belgian Fence, Candelabra and Palmetto Verrier methods.
While espaliers can be trained against a freestanding wire trellis system – making a sort of living fence (as well as a great privacy screen) – they’re most commonly seen grown against south-facing, sunny walls. Picking fruit is much easier when fruit trees are trained like this, while espaliers also offer high levels of productivity while taking up relatively little space. Plus, the heat of the wall can actually help improve fruit growth and reduce the risk of damage from frost.
Another benefit with espaliers is that the way they’re structured ensures good levels of air circulation between the branches, which can help reduce the risk of pests and fungal diseases. What’s more, espalier training maximises exposure to sunlight, helping ensure you a bumper crop of fruit.
What types of fruit trees are suitable?
Apple and pear trees are most suited to espalier training as they cope well with the heavier pruning that espalier training requires. Make sure your tree is a spur-bearing variety, rather than tip-bearing, and choose a self-fertile (or at least partially self-fertile) variety if you’re worried there’s not another apple or pear tree near enough to act as a pollinating partner.
Check out our espalier apple tree guide for more information on this training type.
Top tip: get your complete training kit and create your very own wire trellis ready for your espalier.

Fan
Fan-trained fruit trees are similar to espaliers in the fact that they’re usually grown against a wall or fence, but rather than the regimented tiers of branch pairs you tend to get with an espalier, these fruit trees are shaped, as the name suggests, in a more informal, fan shape with numerous branches spreading out from near the base of the stem.
What types of fruit trees are suitable?
You can train all manner of fruit trees in a fan shape, including stone fruit (drupe) trees like cherries, plums and apricots, as well as pomes like apples and pears. Even soft fruit, like redcurrants and gooseberries, can be trained in a fan shape.
Check out our fan training guide for more information on this particular shape, including both planting and pruning tips.

Cordon
Cordon fruit trees, also known as columnar trees, comprise a single stem from which stubby, fruit-bearing spurs – which span pretty much the entire trunk – branch off. They are either freestanding (with a vertical support) or grown at an oblique, 45° angle against a wall or fence, with oblique cordons being the more traditional growing method.
While the smaller nature of these trees means they’re not perhaps as productive as other trained fruit types, they can still produce sizable enough yields, and offer a great option for small gardens. They’re an especially good option for gardeners who want to grow two or three fruit trees, but might only have the room for one normal-sized tree.
What types of fruit trees are suitable?
Several different fruit trees can be grown as cordons, including apples, pears, cherries, plums and apricots. The important thing is that the tree is grafted onto a less vigorous rootstock (like M26 for apple cordons, for instance) and, where possible, use a spur-bearing variety.
Take a look at our guide to cordon apple trees for more information on these brilliant, space-saving trees.

Stepover
Watch your step! Stepovers are ingenious, single-tiered espaliers which consist of a short central stem, topped with a pair of horizontally-growing branches (or arms). Traditionally grown to edge veg beds in kitchen gardens and allotments, these low-growing fruit trees make an excellent addition to any garden. Plus, what a cool thing to be able to show off when you have guests around…
What types of fruit trees are suitable?
Because stepover trees are essentially espaliers with just one tier, they have the same pruning requirements, meaning apples and pears are therefore the most suitable trees for this type of training.
We’ve previously written a piece covering growing apple stepover trees – the guidance is the same for stepover pears – so make sure to check that out for more information.

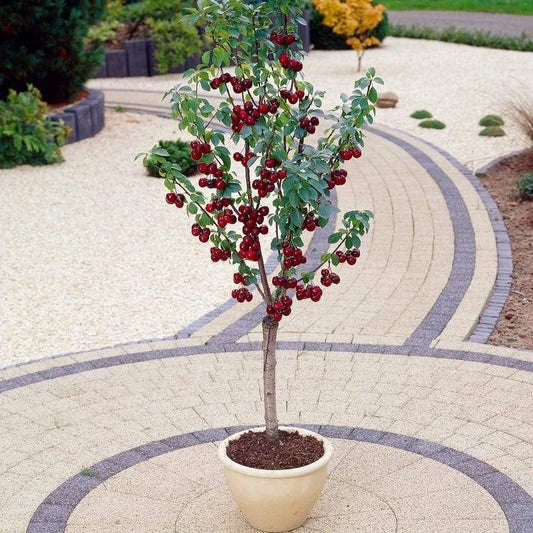
Patio
Patio fruit trees are those that have been grown on a dwarfing rootstock and trained into the perfect, diminutive shape for a patio or balcony growing. First, the tree is grown in the field for a year to thicken up the main stem and develop a strong root system. Then, it’s pruned hard and low to cause branching the following year at a reduced height. With proper pruning, a patio tree will keep its miniature shape, while still bearing delicious fruit.
What types of fruit trees are suitable?
A large number of different fruit trees can be trained in a patio shape, including apples, pears, cherries, plums, apricots, oranges, lemons, limes and figs.
Take a look at our blog post on growing fruit trees in pots for more information on patio fruit tree care.
Frequently asked questions
What does spur-bearing mean?
Spur-bearing means the tree produces fruit on the short, branched shoots of older wood nearer the trunk. This makes them ideal for training as you can safely prune the ends of the branches without losing fruit. Trees can be either spur bearers, tip bearers or partial tip bearers.
How do I build a wire framework for an espalier?
Whether you’re growing your espalier against a fence, on a wall or freestanding, you’ll need to build a framework of wires at the levels you want your espalier’s branches to grow. We recommend spacing these levels 35-45cm apart, with the first tier being around 75cm from the soil. If you’re not sure how many tiers you’ll want, add three or four levels of wire just in case.
If you’re growing your espalier against a fence, you can fix the wires between posts using eye bolts. If you’re using a wall, we’d suggest using vine eyes and a tightener to make sure the structure is strong enough. You’ll also need a wire framework if you’re growing a fan-trained tree or wall-trained cordon.
Do trained fruit trees need special pruning?
Yes, most trained fruit types require specific kinds of pruning in order to retain their shape and to continue being productive. Luckily for you, you’ll find all the pruning requirements for your particular training type in the articles we’ve listed above.
What’s the difference between espalier and cordon?
A cordon can be thought of as an espalier with its limbs lopped off. In other words, they both have a central stem or ‘leader’, but espaliers have tiers of long branches, while cordons have very compact, fruiting spurs.
Final thoughts
So there you have it! Your guide to understanding trained fruit trees done anddddd dusted. Once you’ve decided which trained tree sounds best for you, take a look at the individual articles referenced above for more ‘training’ on training. Then, prepare for the satisfaction of your own delicious fruit – trust us, there’s nothing quite like it.
Last updated: 24/10/2024