Related articles


How to Dry Herbs

There’s nothing better than growing your own herbs - except perhaps for eating them! However, fresh herbs don’t last long once they’re harvested, so if you find yourself with a glut of herbs - as can happen with prolific producers like rosemary, bay and mint - then drying is an easy and effective way to preserve them. Read on to learn how to dry herbs no matter the equipment you have.
Jump to:
- Why dry herbs?
- Best herbs for drying
- Self-drying herbs
- What not to dry
- Harvesting herbs
- How to dry herbs
- Storing dried herbs
- Using dried herbs
Why dry herbs?
Dried herbs will last for months or more in an airtight container, saving space in your fridge or freezer. The process of drying retains a lot of the flavour and nutrients in the herbs and concentrates the flavour intensity, so that in most cases you can use a smaller quantity of dried herbs compared to the fresh version.
Best herbs to dry
Almost any herbs can be dried - if you have a lot of one particular variety and nothing to lose, why not give it a go? Choose your method carefully, as each way of drying can be more suitable for some herbs than others.
The amazing self-drying herbs
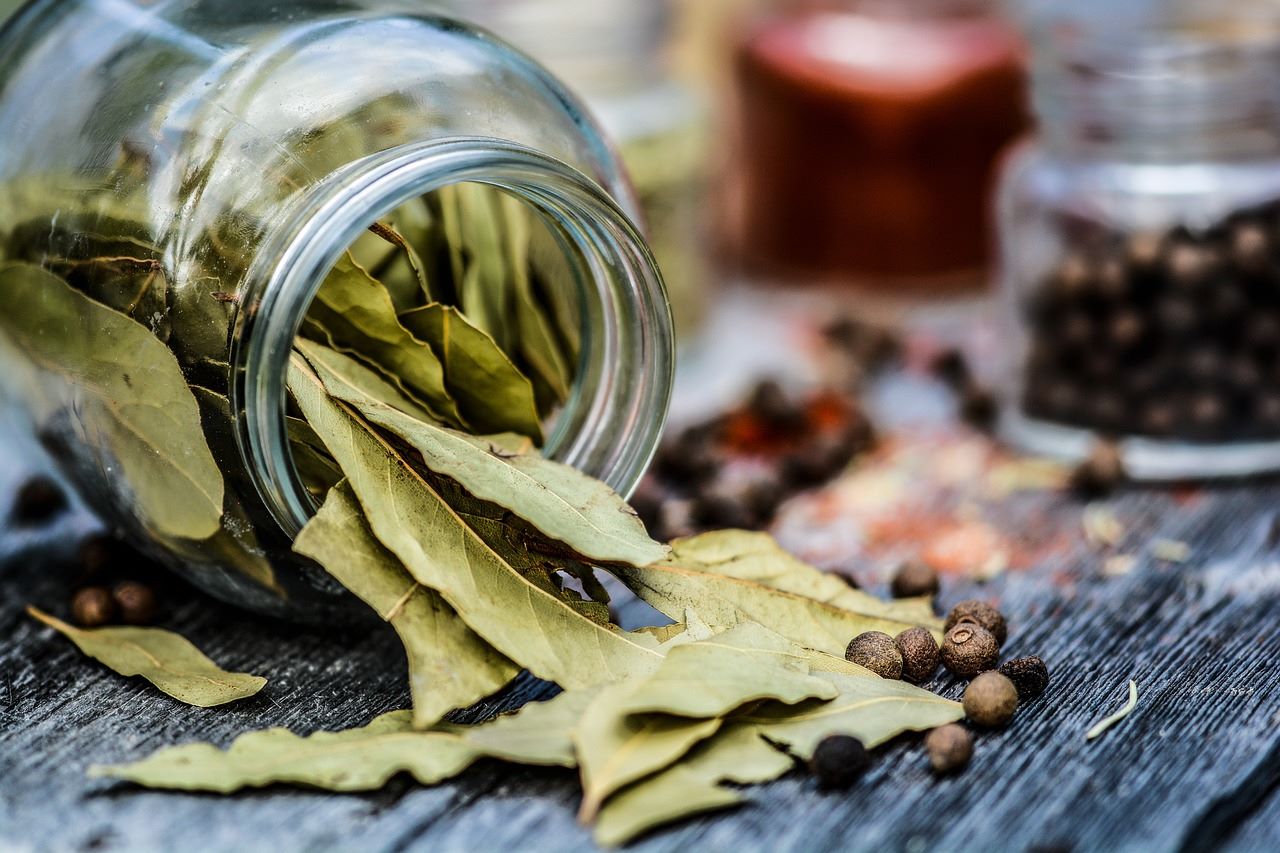
If you have a bay tree it’s even easier as the leaves will dry by themselves. Just pick them off your bay trimmings and store them in a paper bag until they’re fully dried. Use them whole to add depth of flavour to everything from casseroles to curries, and remove before serving.
What not to dry
Some herbs lose too much of their flavour when dried - these include basil, borage, chives, coriander and parsley. You can still dry these (the quicker the method, the better) but freezing is a tastier option - just wash, pat dry and place the stems in a plastic bag in the freezer, or chop them and freeze in an ice cube tray.
How to harvest your herbs
If you’re not in a hurry for your herbs, it’s a good idea to prepare them the day before you harvest them, by spraying them with water. This will remove any soil, dust, insects or spider webs that might have accumulated on the plant.
The best time to harvest is in the morning, on a dry and sunny day. Most herbs are best picked just before they flower in spring or summer for the best flavour, but don’t worry if you’ve missed that window. Your herbs will still taste exponentially better than shop bought!
Using clean, sharp scissors, snip off whole stems of the plant - younger leaves at the tips of the stems have the best flavour, and if you leave about 15cm of the stem at the bottom, it will keep growing. Remove any damaged, discoloured or pest-eaten leaves and compost them.
If you’re not going to dry them immediately, you can stand your cut herb stems in a glass of cold water in a cool spot away from direct sunlight until you’re ready.
How to dry your herbs
There are several different methods for drying herbs, so you won’t need any special equipment - just use what you have to hand.
Air drying herbs
- Best for: herbs with long, strong stems such as sage, rosemary, lavender and lemon verbena.
- Pros: cheap, no gas/electric needed, retains the flavour.
- Cons: not as quick as some methods, takes up space.
- Time needed: at least a week.
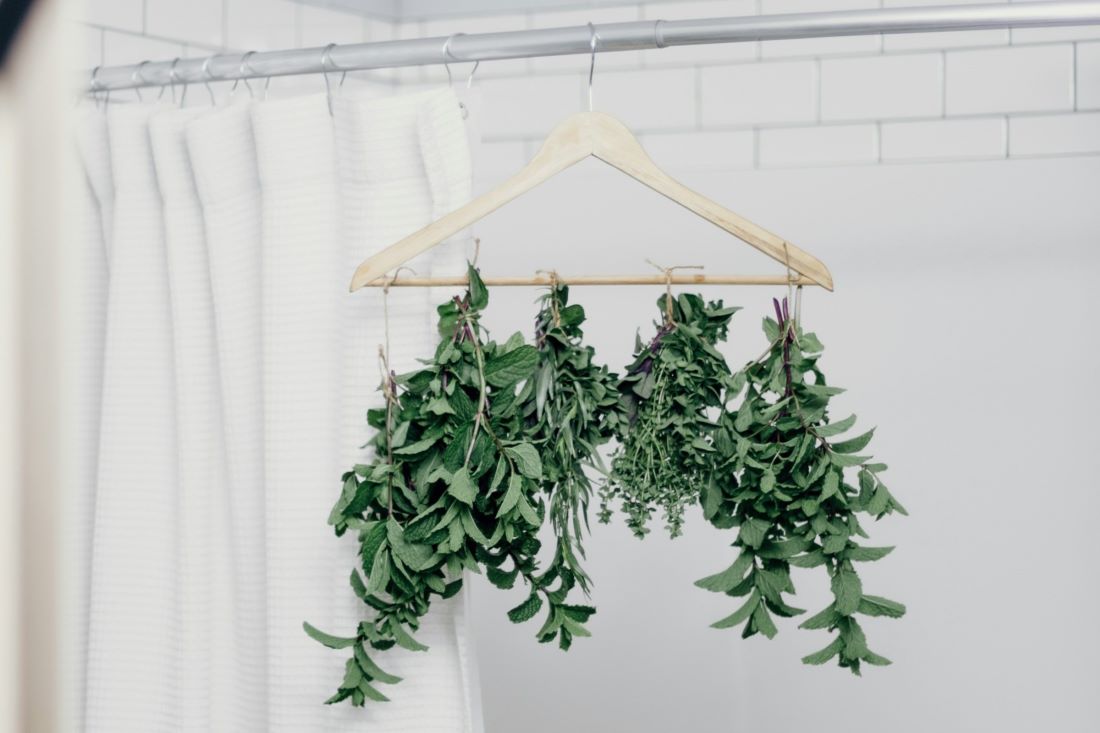
The original and best - but it does take time. The traditional way of drying herbs is to bundle them together and hang them upside down. The best place to air dry herbs is a warm indoor room with good air circulation, away from moisture (so not the kitchen, laundry room or bathroom). A dark place is better still.
Gather a small bundle of herbs and fasten them together at the bottom of the stems with a rubber band. Then hang the bundles upside down with plenty of space between them (the more air circulation the better). You can hang them from a coat hanger, picture hook or washing line - mine are hung from drawing pins on my bookshelves.
Although herbs with strong stems are best for hanging to dry, you can still dry more fragile herbs like basil and parsley, by laying them out on a wire rack or baking tray lined with paper towels or newspaper. If you’re using this method you can remove the leaves from the stems and they will dry quicker. Cover your drying herbs loosely with paper to avoid contamination from dust or insects. If your herbs have flowers or seed pods on them, you can tie a paper bag around them to collect the seeds, too.
Air drying by hanging takes about a week to complete, with drying flat taking a little longer. Your herbs will be ready when they detach easily from the stems or crumble between your fingers.
Drying herbs in an air fryer
- Best for: basil, oregano, thyme, rosemary, tarragon, mint, parsley, chamomile.
- Pros: keeps the flavour in, very quick.
- Cons: the price of the air fryer unless you have one already.
- Time needed: 3-4 minutes.
If you have an air fryer, here’s yet another job it can do!
Wash and pat dry your herbs, then place them in a single layer in the air fryer basket. To stop them being blown around during cooking, tie the stems with string or put a metal rack on top of the herbs.
Air fry them at 160°C until they look dry and crumble in your hands - this should take around 3-4 minutes. Remove your herbs and let them cool completely before putting them in a storage container.
Drying herbs in a dehydrator
- Best for: herbs with a high water content, eg: basil, mint, sage, tarragon, thyme, parsley.
- Pros: great if you have the equipment to hand (mini dehydrators can be bought for under £30).
- Cons: not so much if you don’t - unless you dry a lot of herbs, it probably isn’t worth the money and kitchen counter space.
- Time needed: 1-3 hours.
Dehydrating is a little different to drying. It gently removes all of the moisture from food using circulating heat, while retaining the nutrients. It’s a good method for herbs with a high water content which are more at risk from mould, which benefit from being dried quickly.
Arrange your herb leaves in a single layer in the dehydrator tray with space between them and dehydrate at 30-45°C). Keep checking the herbs - when all the moisture is removed, they should feel dry and crumbly, which can take from 1-3 hours. If the herbs dry unevenly, try turning the temperature up a little or switch the trays around.
Drying herbs in a microwave
- Best for: any herbs.
- Pros: quick and easy.
- Cons: can reduce flavour, slight fire risk.
- Time needed: 4-6 minutes.
Drying your herbs in the microwave is an easy way to get them in a hurry, but I can’t stress this enough - don’t leave them unattended while the microwave is on, as if you don’t have enough leaves in there, you can create a lot of steam or even set the paper towels on fire (the same applies to anything microwaved without water or fat). If in doubt, open the door and abandon the mission.
So with that out of the way, here’s how. Arrange your herb leaves in a single layer between two paper towels in the microwave. Using your lowest heat setting (usually ‘defrost’), heat the herbs for 2-3 minutes. Check them, turn the paper towels over and repeat. If your herbs aren’t crumbly after this, you can repeat the process until you’re happy.
Drying herbs in an oven
- Best for: any herbs.
- Pros: takes less time than air drying - good if you’re in a hurry.
- Cons: herbs can easily burn. You’ll lose a lot of nutrients and flavour.
- Time needed: 1-2 hours.
If your oven can get to a really low temperature (we’re talking ideally 50°C) then you can use it to dry herbs.
Remove the leaves from the stems and lay them out evenly on a lined baking tray, then place them on the bottom shelf of your preheated oven.
I wouldn’t personally recommend this method as it is rather labour intensive - you’ll have to keep checking the oven in case your herbs burn, turning them over every twenty minutes.
How to store your dried herbs
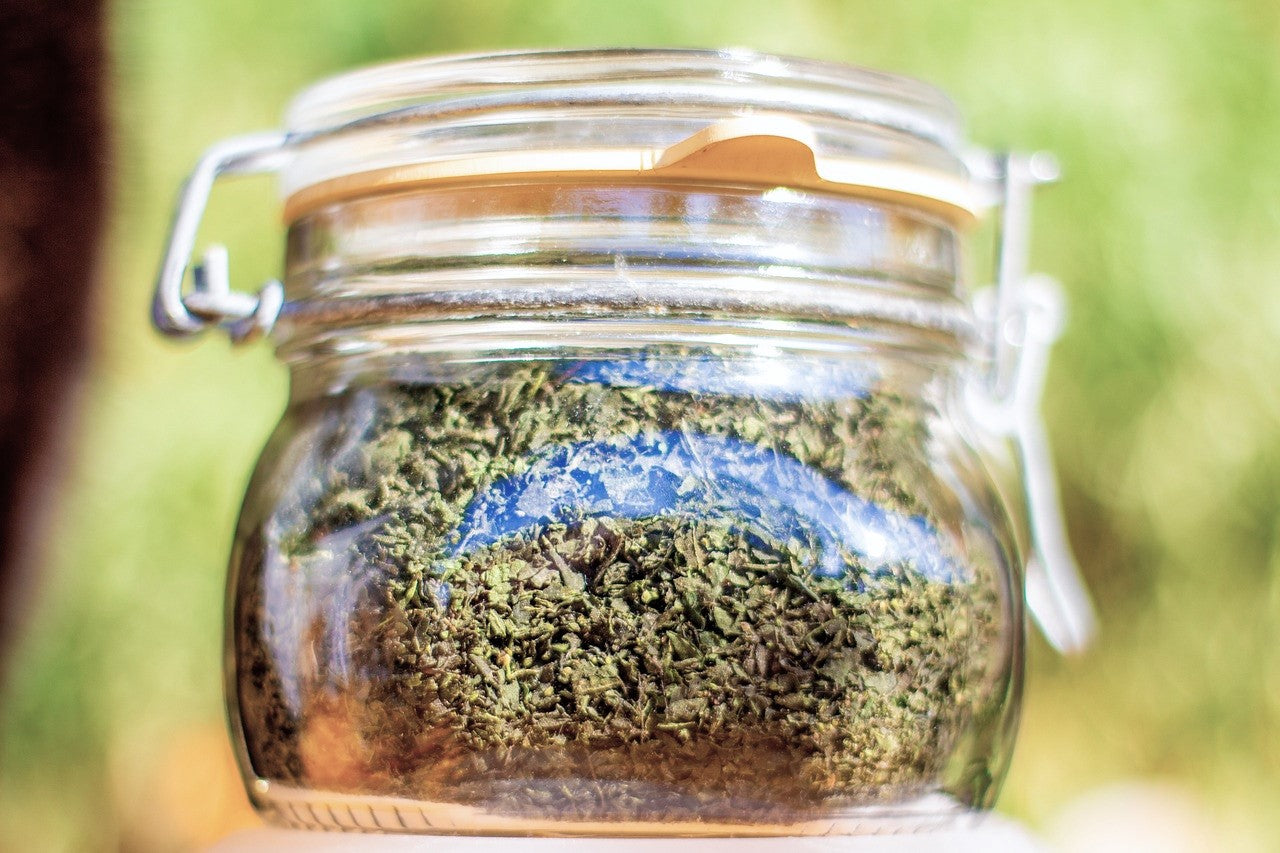
Make sure your herbs are 100% dry before you store them, or you run the risk of them going mouldy. To check, rub them between your fingers - if they’re fully dried they should crumble like an egyptian mummy in an adventure film.
Store them in airtight containers (herbs, not mummies) in a cool, dark place away from bright light and heat sources. Label the containers, as when they’re dried and crumbled, many herbs look the same. If you don’t have jars or pots, self-seal bags are fine.
You can store your herbs for up to a year. (Just don’t check the labels on mine… 2016 was only yesterday, right?)
How to use your herbs
As well as using them in your cooking, home-dried herbs are brilliant for herbal tea (use the leaves loose or put them into reusable cloth tea bags) or homemade soaps and cosmetics. (I use melt and pour soap with dried lavender and oat milk but you can experiment with combinations of your own favourite herbs.
Last updated: 17/01/2024


