Related articles


Storing Vegetables Grown at Home
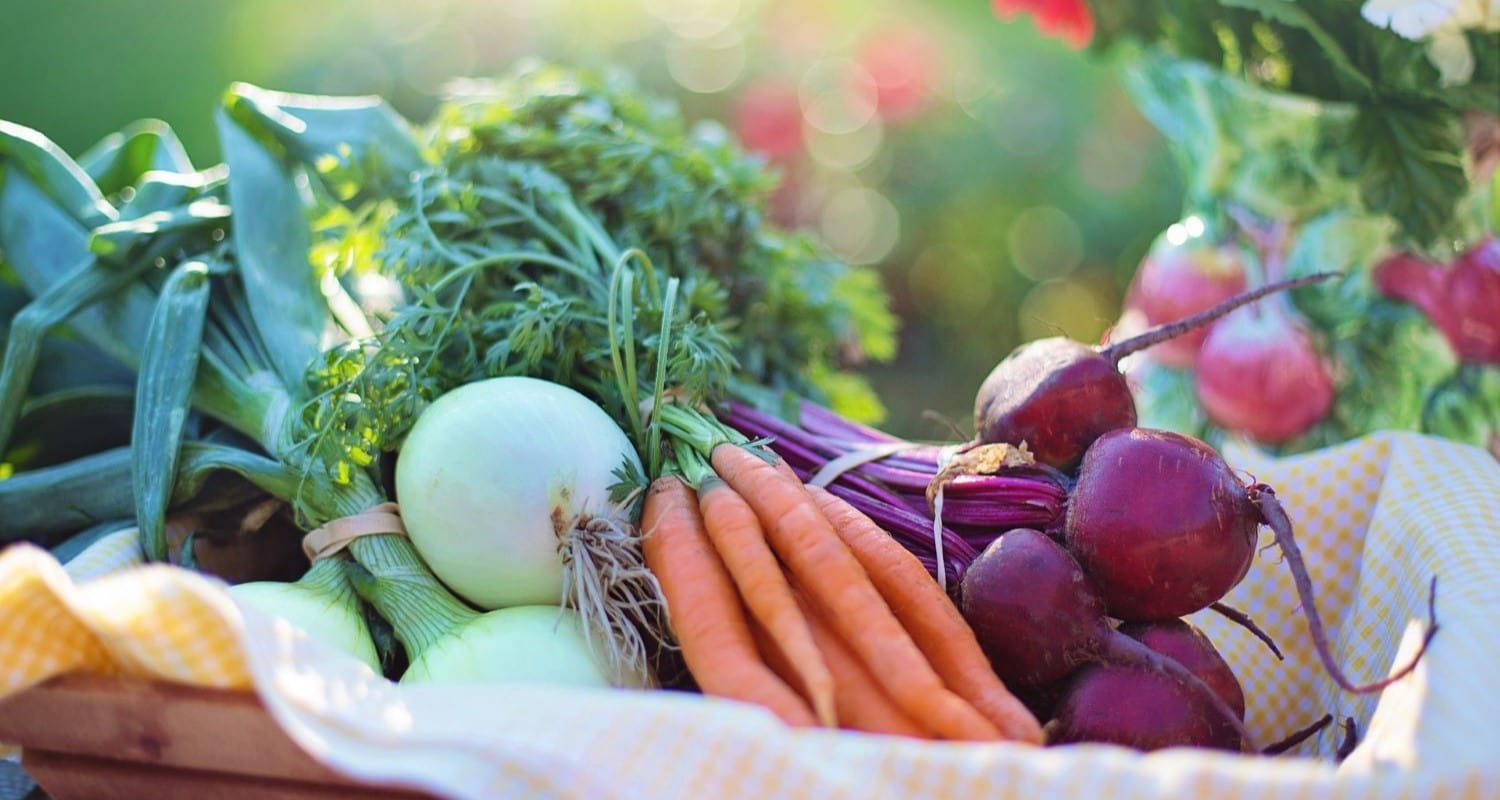
So you’ve got your first vegetable harvest - lots of lovely tomatoes, beans, lettuces and peas. Lots and lots aaand lots of courgettes. Too much veg is a nice problem to have, but you can’t eat it all at once and if you’re anything like me, you don’t want to waste even one carefully-nurtured kale leaf! Here’s how to start storing vegetables by keeping them fresh for now or preserved for later.
Jump to:
- Refrigerating vegetables
- Recipes to use up a glut
- Freezing vegetables
- Pickling vegetables
- Vegetable chutneys
- Drying vegetables
- Sharing and swapping
- Composting
How to store vegetables in the fridge
The fridge is usually the default option for storing vegetables, but some are best kept out of it.
Keep these in the fridge
Salad veg that contain a lot of water such as lettuce, cucumber and celery and green leafy veg like spinach should be stored in the fridge, as should herbs. A good rule of thumb is that greens go in the fridge and veg of other colours do best at room temperature.
Keep these out of the fridge
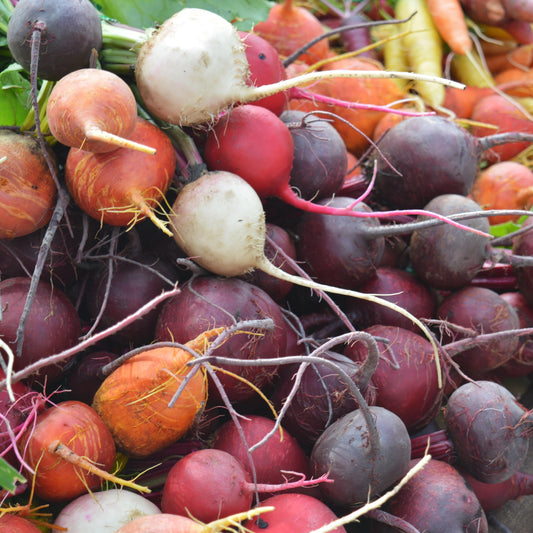
Vegetables with soft flesh such as tomatoes and aubergines should be stored at room temperature, out of direct light. Root vegetables including beetroot, carrots and parsnips should be kept in a cool dark place, as should potatoes, onions and squashes.
Never wash your vegetables before refrigerating them - the moisture can cause moulds. Most vegetables will keep for a week or two in the fridge. Eat them raw as soon as possible and use any that are on their way out in soups, smoothies or any of the recipes below.
Recipes to use up a veg glut
The obvious answer is soup, but it’s not always what you want in summer. Freeze some for the colder months or try one of these recipes, which can be adapted for any kind of vegetables.
- Vegetable pasta bake
- Vegetable butter masala
- Vegetable stir-fry
- Vegetable crumble
- Vegetable smoothies
You may find you have an overabundance of one particular vegetable - in which case, here are some suggestions for the most common gluts - green beans, tomatoes and courgettes. I can heartily recommend the chocolate courgette cake!

Freezing vegetables
These vegetables can be chopped and frozen straight after harvest
Peppers, tomatoes, onions, leeks, herbs.
These vegetables need to be blanched first
Asparagus, beans, broccoli, cauliflower, brussels sprouts, cabbage, carrots, sweetcorn, chard, kale, turnip, spinach, peas (pods removed), courgettes.
These need to be fully cooked first
Beetroot, mushrooms, potatoes.
Don’t freeze these
Chicory, cucumber, endive, kale, lettuce, radishes and Jerusalem artichokes.
Here’s how
- Wash and dry your vegetables then freeze them whole, slice or grate them, whichever makes them easier to use.
- Blanch them if you need to, by boiling them briefly then plunging into cold water to prevent them overcooking (here’s a complete list with blanching times).
- Lay out your vegetables on a baking tray and put them in the freezer.
- When they’re frozen, remove them from the tray and put them in a container or bag, then replace them in the freezer - they shouldn’t stick together so you can use what you need each time.
- Your vegetables will keep in the freezer for around six months.

Pickling vegetables
Sometimes the old ways are the best - pickles are great to liven up sandwiches and salads or with cheese boards, curries and burgers. Here’s a simple recipe that makes one jar of pickle but can be scaled up to make more.
You’ll need:
A sterilised jam jar
- Any vegetables, e.g. 1 red onion / ¼ cucumber / 1 carrot
- 2 tsp sugar
- 1 tsp salt
- About 125ml white wine vinegar, depending on the size of your jar
How to make:
- Slice your vegetables into a bowl and sprinkle over the sugar and salt.
- Rub it into the vegetables then squeeze out the excess moisture.
- Pack your veg into the jar and pour in enough vinegar to half-fill the jar.
- Top up with water so that the vegetables are covered, seal with a lid and shake well.
- Your pickle will be ready after twenty minutes and will keep for two weeks in the fridge.
Alternatively, you could make delicious Korean Kimchi - it’s a little more tricky but well worth the effort.

Chutney
Making chutney is a time-honoured way of using up a vegetable glut. It also makes a good gift for friends and family if they like it. Here’s a basic recipe that can be used with any vegetables - you can vary the spicing to suit your taste.
Feeling ambitious? Try one of these lovely Indian chutneys!

Drying vegetables
Many vegetables can be preserved by drying, with different methods suitable for each.
Root vegetables: beetroot, carrot, parsnip, sweet potato
If you have a food dehydrator this is easy, but you can also use your oven. The process does take a few hours, so make sure you have enough vegetables to fill the oven and make it worthwhile.
After peeling and slicing your vegetables, heat your oven to 100C.
Lay out the vegetables on a baking tray, spray them with oil and check them regularly to see if they’ve reached the level of dryness you want. They make a lovely healthy alternative to potato crisps.
Chillies
As easy as making a popcorn garland! Simply thread a needle and pass it through the base of each chilli stem until you have a long line of them. Then tie a loop at the top and hang them up in a warm, dry, airy place. Once fully dry, you can use them whole or remove the stalks and grind them in a coffee grinder or pestle and mortar to make chilli powder.

Tomatoes
To make ‘sun dried’ tomatoes in the oven:
- Slice your tomatoes in half and arrange them on a baking tray.
- Sprinkle on some salt and drizzle lightly with olive oil.
- Bake on the lowest possible heat - this takes around 8-12 hours so make sure you fill the oven to make it worthwhile.
Once dried, you should store your tomatoes in oil. Pack them into a sterilised jar (you can add herbs if you like) and cover them in heated oil. Allow it to cool down, then replace the lid. They should keep for about a year.
Herbs
Simply gather your herbs in a bunch, tie string around the stems and hang them up in a warm, dry and airy place - they’ll be ready in a couple of weeks. For a short cut, you can dry them in the microwave - lay your herbs between sheets of kitchen paper and heat for a minute, then keep giving them another thirty seconds and checking them until they’re done.
Sharing and swapping
The easiest way of sharing your crop is to leave it in a box outside your house or on a wall with a sign saying “FREE!” If you can’t do this, or if you want to be a bit more social, look out for local community food shares or food swapping apps. Olio allows you to post your surplus food for other users to claim - you can even pick yourself up some different produce or rescue things the supermarkets would have thrown away.
If all else fails…
Compost your excess veg and turn it into next year’s crop! All together now, it’s the circle of life…

Last updated: 28/11/2023